
This article describes how to view the Organizations associated with a Provisioning Entity and manage them, including how to edit Organization information and how to delete an Organization.
How to View the Organizations associated a Provisioning Entity
2. If you have access to multiple Provisioning Entities, ensure you’ve selected the one you wish to view as described in How do I Switch between Provisioning Entities?
3. Click on Organizations:

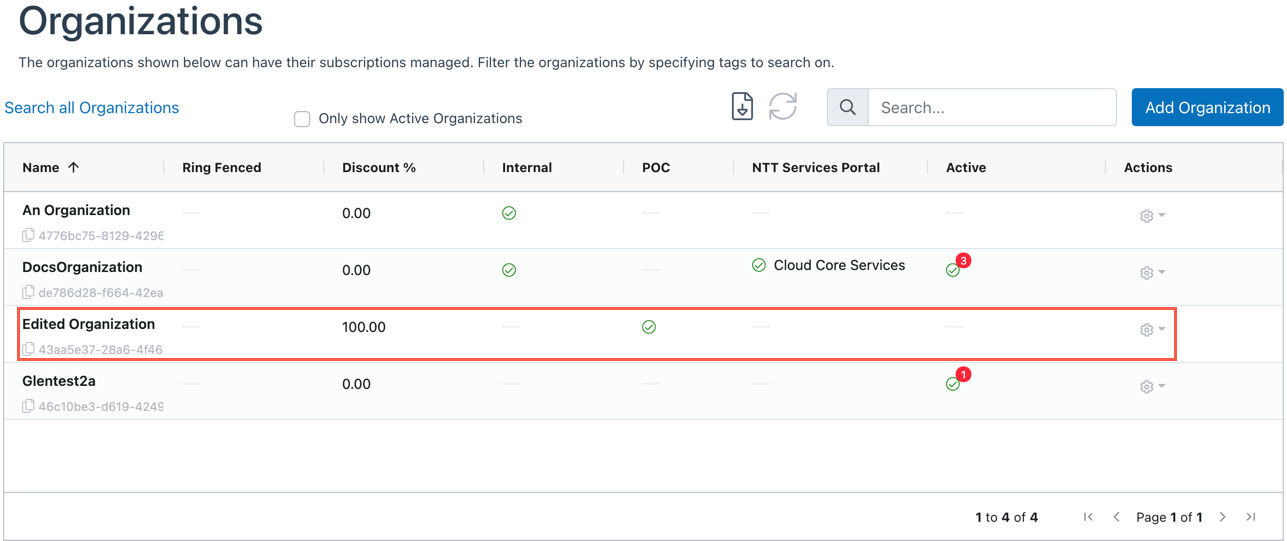
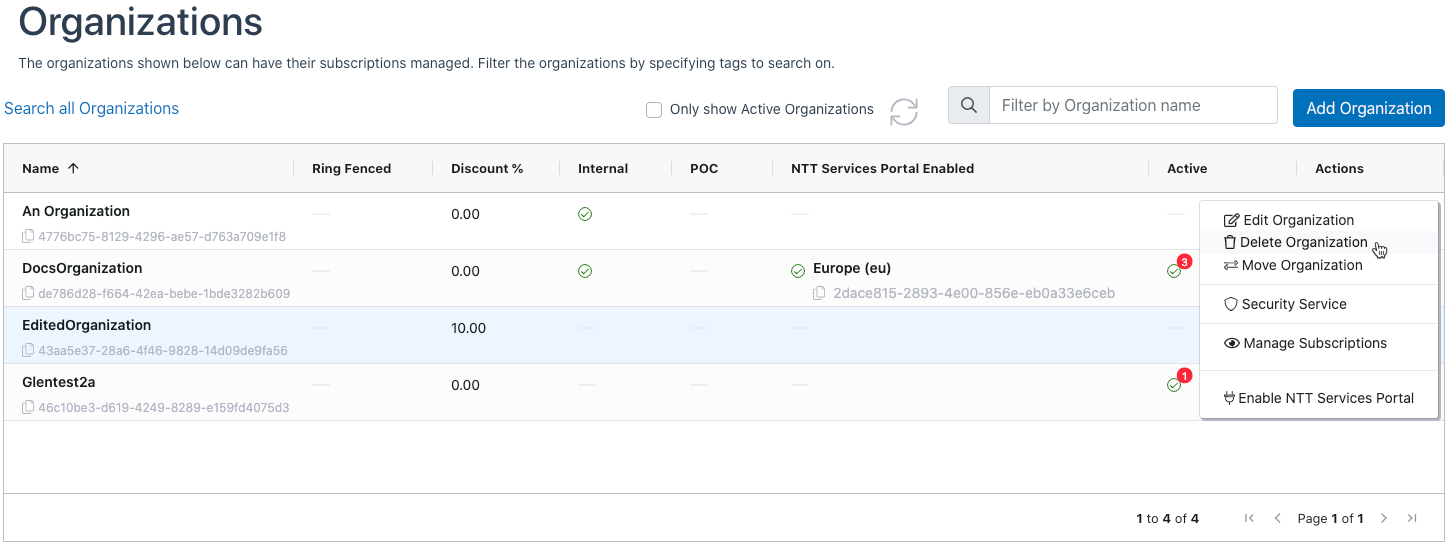
4. The Organizations page will be displayed with a list of the Organizations associated with the Provisioning Entity:
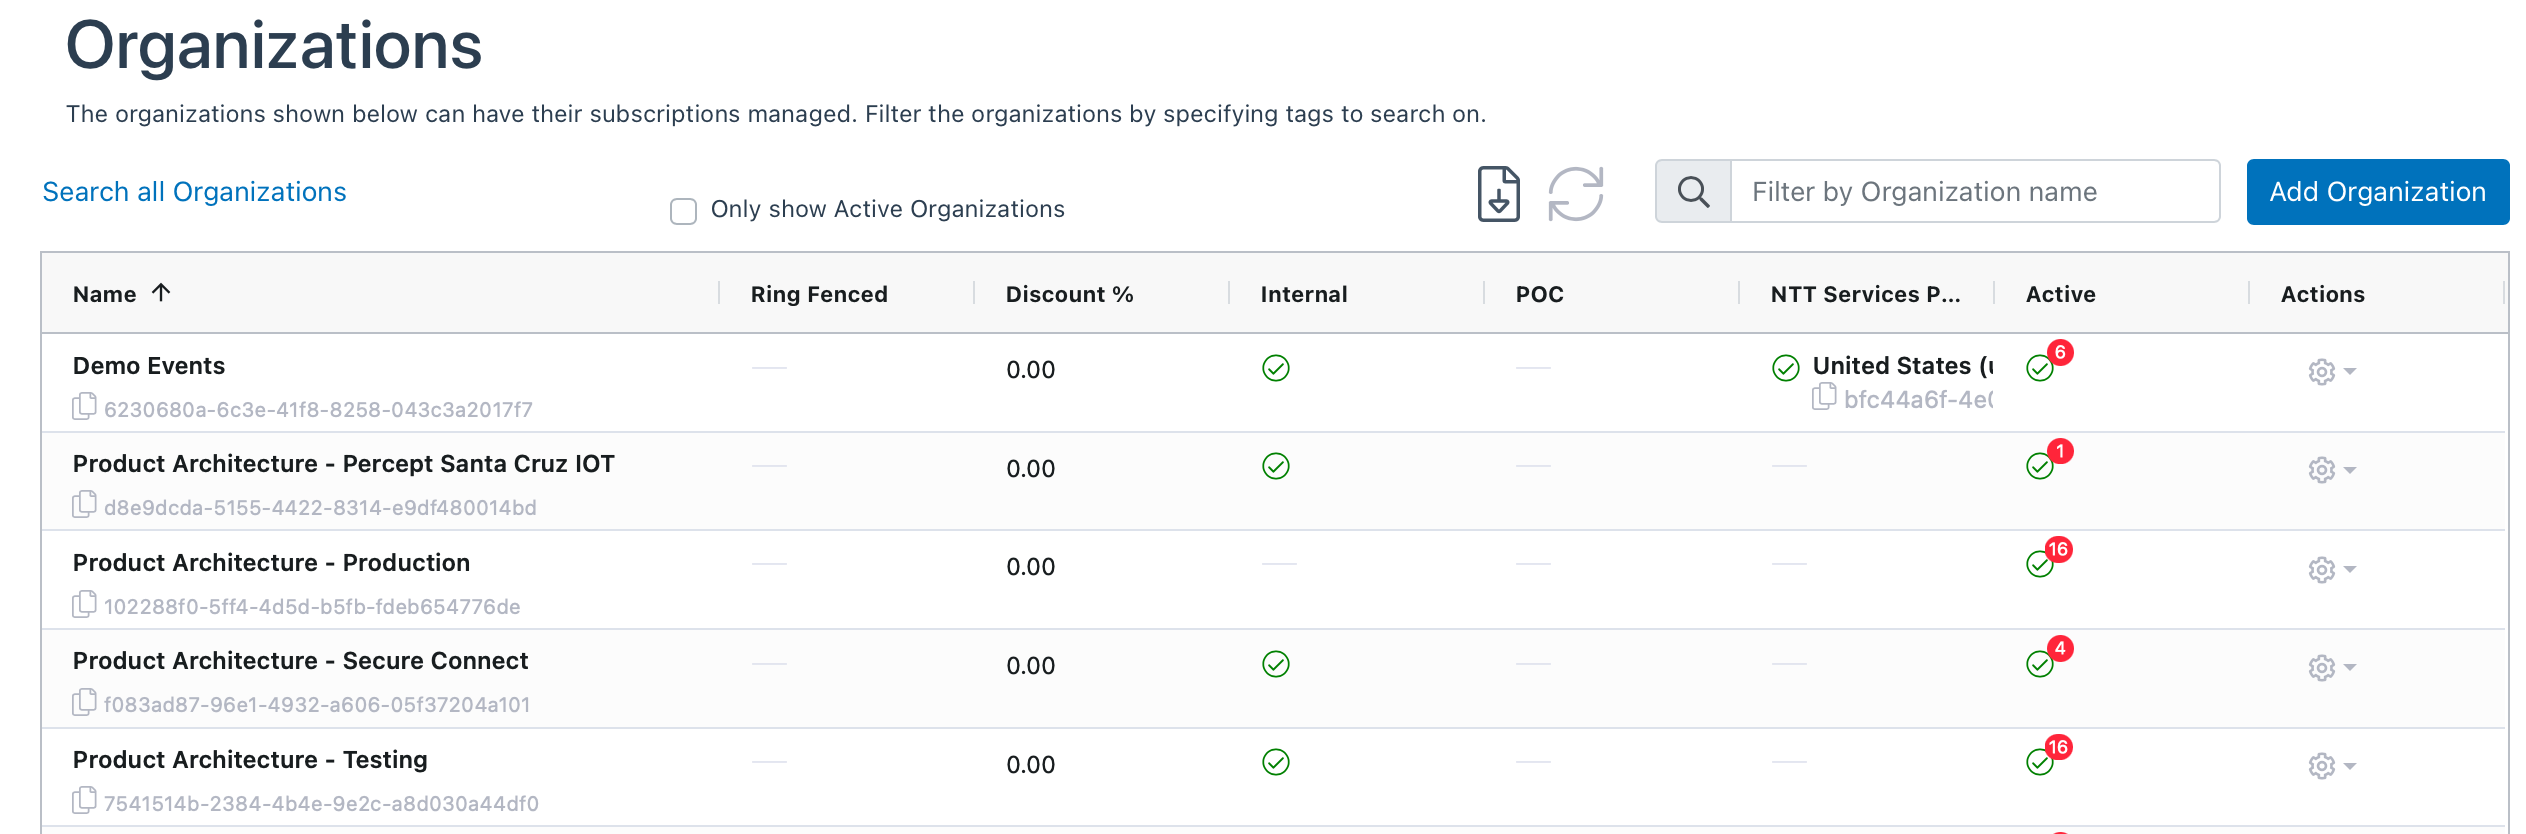
- Name – This column indicates the Name of the Organization as well as the ID which can be copied by clicking the ‘Copy ID’ icon

- Ring Fenced – If the Organization is Ring-Fenced Enabled, this column will have a checkmark
- Discount % – This column indicates the Discount % applied to the Organization
- Internal – If the Organization is Internal, a checkmark will appear in this column
- POC – If the Organization is a Proof of Concept (POC), a checkmark will appear in this column
- NTT Services Portal – This column indicates if the Organization has been enabled for the NTT Services portal services, and will display the service(s) that are enabled. Possible services are:
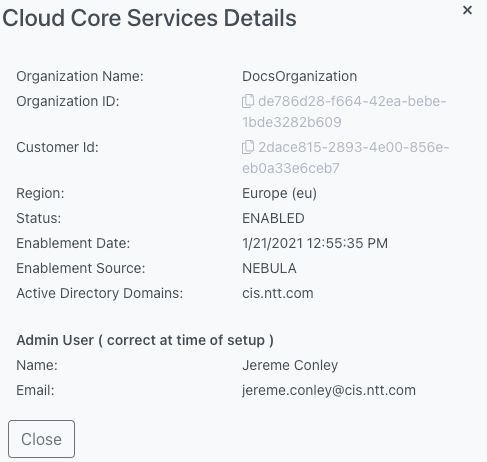
- Cloud Core Services – Indicates the Organization is enabled for the Cloud Core Services application (click the link for further information)
- If you click on the green check-mark icon, a popup with additional information about the service will be displayed:

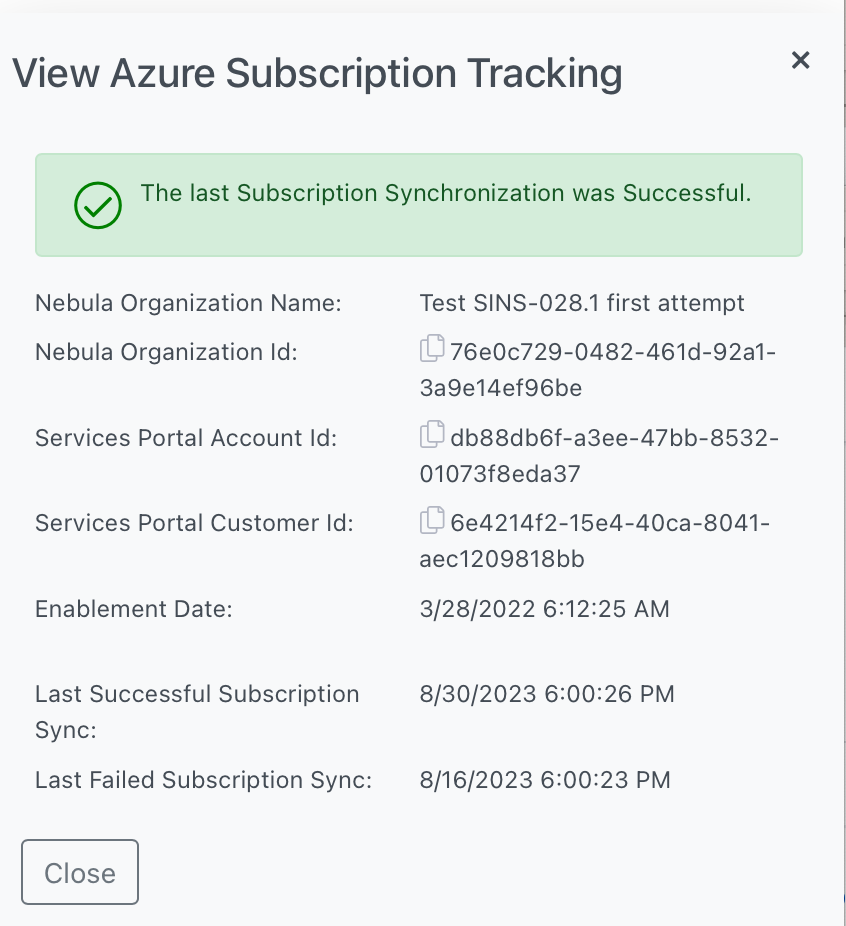
- Azure Subscription Tracking – Indicates the Organization is enabled for Azure Subscription Tracking in Angora (click the link for further information)
- If you click on the green check-mark icon, a popup with additional information about the service will be displayed:
- If you click on the green check-mark icon, a popup with additional information about the service will be displayed:
- If you click on the green check-mark icon, a popup with additional information about the service will be displayed:
- Cloud Core Services – Indicates the Organization is enabled for the Cloud Core Services application (click the link for further information)
- Active – This column indicates whether the Organization is ‘Active’ or not. An active Organization has at least 1 Subscription provisioned. The checkmark indicates an Active Organization and the number next to the checkmark indicates the number of allocated Subscriptions
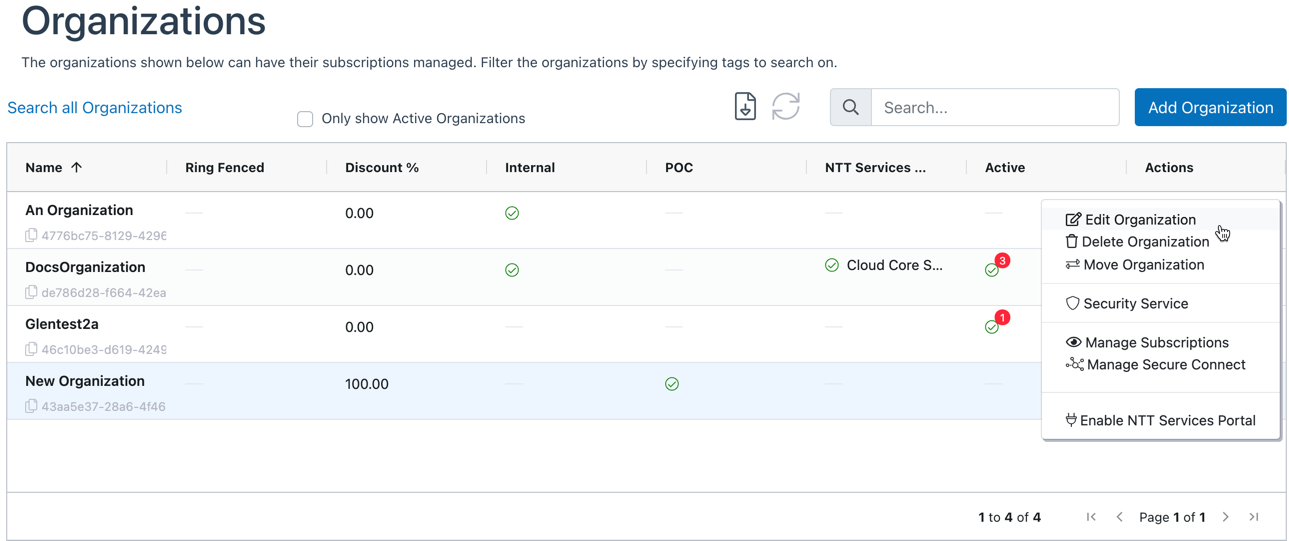
- Actions – The cog in the Actions menu lets you take various actions relating to the Organization
4. The data on this view can be exported using the CSV icon – for more details see How to Download the Contents of a Nebula Table as a CSV
How to Edit an Organization
1. On the Organization view, locate the Organization you want to manage, and click on the cog in the Actions column, and select “Edit Organization”:
2. The Edit Organizations dialog will be displayed:
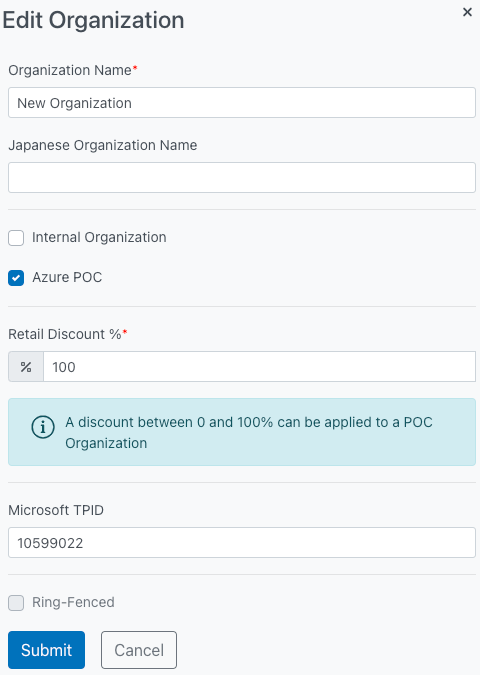
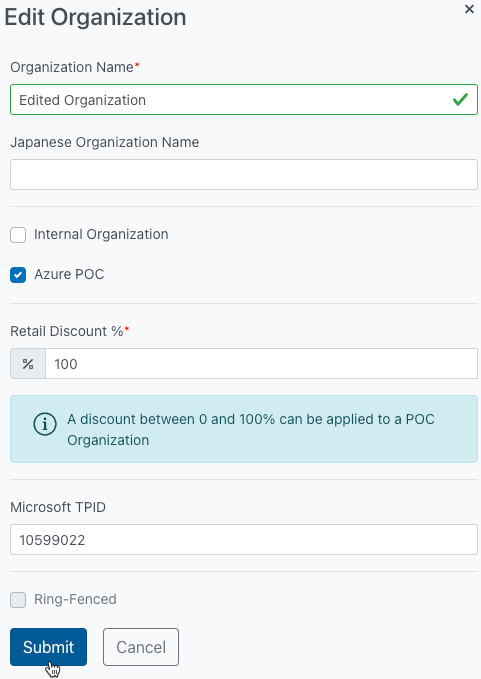
3. You can edit various fields. Once you have made the desired edits, click Submit:
- Organization Name: The Name that is associated with the Organization
- Japanese Organization Name: The Japanese name that is associated with the Organization, if applicable.
- Internal Organization: Check this box if the Organization is for Internal use
- Note: The Provisioning Entity must be enabled for creating Internal Organizations for this box to be selectable
- Note: If you click the Internal Organization box, the Retail Discount % section will disappear
- Azure POC: Check this box if this is an Azure “Proof-of-Concept” in which case the retail discount can exceed the normal maximum discount of 10%. The expectation is that any such discounting is temporary and will be removed once the POC is complete.
- Retail Discount %: Enter the amount of discount the Organization should receive off retail PAYG changes for applicable components as described in Discount Eligible Azure Meters.
- The system will allow a maximum discount of 10%, which represents the current floor price. Organizations requiring greater than 10% discount can be accommodated but require approval from Commercials team.
- Note: If you change the Retail Discount %, the new discount will be reported for all usage starting with the beginning of the calendar month in which the change is made – i.e. if you make the change on September 16th, it will be reported for all usage starting with September 1st.
- Microsoft TPID: Top Partner ID (TPID) is a proprietary Microsoft code assigned to a given company at its subsidiary or corporate headquarters organizational level. It should be entered for the Organization if the NTT Provisioning Entity has registered the opportunity with Microsoft for joint sales. The TPID number needs to come from Microsoft.
- A TPID cannot be assigned to “Internal” Organizations
- The TPID will always be a number
- Ring-Fenced Enabled: This tick box is not editable, but if the Organization is Ring-Fenced enabled, this box will be ticked and the dialog will be expanded and you can view the following non-editable fields. For more details on Ringfenced status, see What is an Organization?:
- Ring-Fenced Organization Name – The Ring-Fenced Organization Name. This can be different than the Organization Name
- Japanese Ring-Fenced Organization Name – The Ring-Fenced Organization Name in Japanse, if applicable
- Ring-Fenced Ids – Ringfenced Ids can be any Id used to identify the customer in whatever systems support their environment prior to migration. For example, MCP customers will have CloudControl GUID. There can be multiple Ring-Fenced Ids. They can be separated by a comma or entered on separate lines.
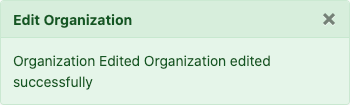
4. The UI will display a message indicating that the operation was successful:
5. Any changes will be displayed in the UI:
How to Delete an Organization
1. Navigate to the Organization you want to delete. Click on the cog in the Actions column, and then select “Delete Organization”:
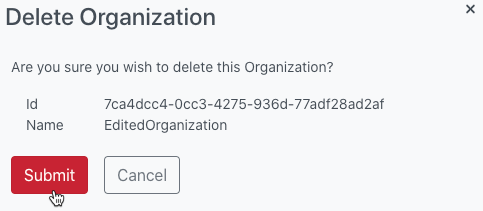
2. The Delete Organization dialog will be displayed. Verify that you have selected the correct Organization, and then click “Submit”:
3. The UI will display a message indicating that the operation was successful, and the Organization will be deleted:
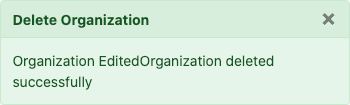
4. The Organization will be deleted.
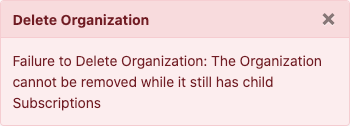
Note: If the Organization has a subscription, you will not be able to delete the Organization. The UI will display the following error:
Azure Subscription Tracking
Azure Subscription Tracking is a feature that can be enabled through the Operator Portal. Enabling this feature allows the Subscription to show up in the Angora ticketing system.
This section explains how a Nebula user can see which Subscriptions have Azure Subscription Tracking enabled in the Nebula UI.
1. Log in to the Nebula UI and click on the Organizations button:
2. The Organizations page will be displayed. Locate the Organization for which you would like to view the status of Azure Subscription Tracking. The NTT Services Portal column will display an icon with the text “Azure Subscription Tracking” for any organization that has the feature enabled.
3. Click on the checkmark icon to expand a dialog with additional information:
- Nebula Organization Name – Indicates the name of the Nebula organization for which Azure Subscription tracking is enabled
- Nebula Organization ID – Indicates the ID of the Nebula organization for which Azure Subscription tracking is enabled
- Note: You can copy the ID by clicking on the copy icon

- Note: You can copy the ID by clicking on the copy icon
- Services Portal Account ID – Indicates the Account ID of the Services Portal Account for which Azure Subscription tracking is enabled
- Note: You can copy the ID by clicking on the copy icon

- Note: You can copy the ID by clicking on the copy icon
- Services Portal Customer ID – Indicates the Customer ID of the Services Portal Account for which Azure Subscription tracking is enabled
- Note: You can copy the ID by clicking on the copy icon
- Note: You can copy the ID by clicking on the copy icon
- Enablement Date – Indicates the date on which Azure Subscription Tracking was enabled for the Organization.
- Last Successful Subscription Sync – Indicates the date on which the last successful subscription sync took place
- Last Failed Subscription Sync – Indicates the date on which the last unsuccessful subscription sync took place, if any