
This article explains how to transfer an Azure Subscription to a new Azure Active Directory (AAD). This process is performed in the Azure Portal and is not connected to Nebula.
1. Navigate to the Subscriptions Azure AD Tenant, and log in with the username (email) that was used to provision the Subscription in Nebula: https://portal.azure.com/#@subscriptions.cloud-services.ltd
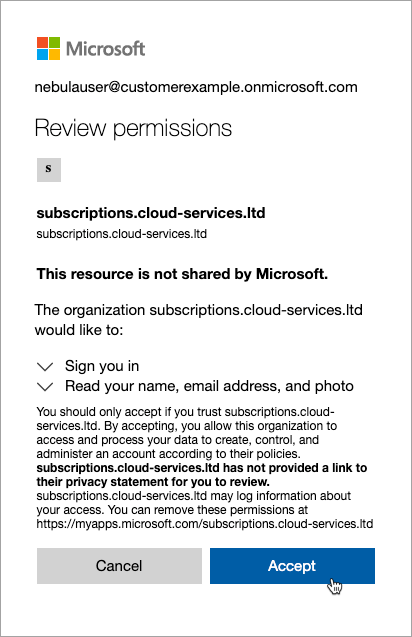
2. If this is the first Subscription you are attempting to transfer, you will be directed to a Microsoft Dialog. Accepting this dialog will grant you access to NTT LTD’s Subscription AD Tenant as a guest user so that you can retrieve your Subscriptions. Click Accept:
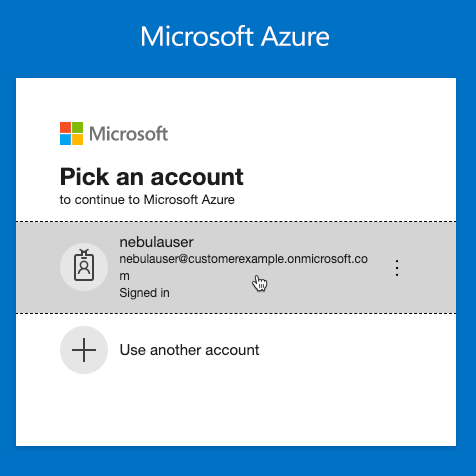
3. If you have previously accepted the permission dialog, you will be asked to sign in to the Azure Active Directory (if not already signed in). You should log in with a user which has access to the Directory where the Subscription you want to transfer is located:
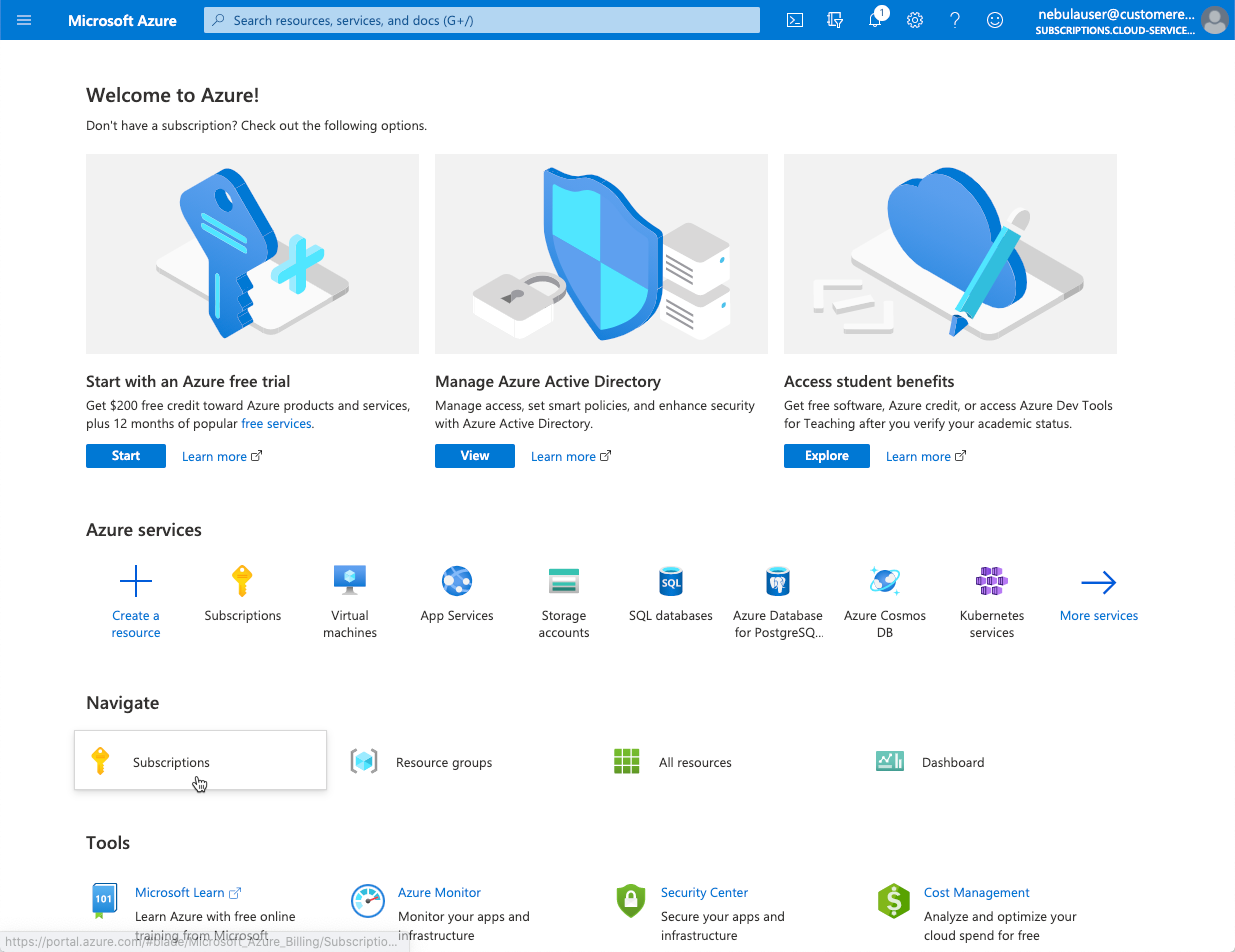
4. You will be directed to the Azure home page inside the Active Directory Tenant called subscriptions.cloud-services.ltd. Click on Subscriptions:
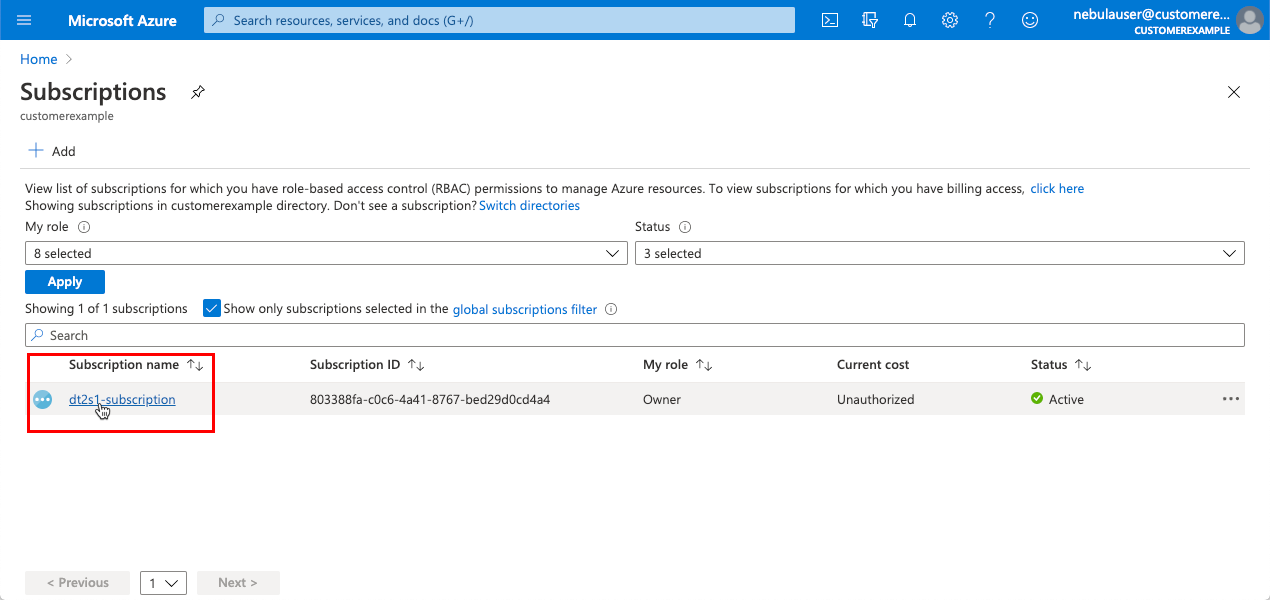
5. Select the Subscription you want to transfer by clicking on it:
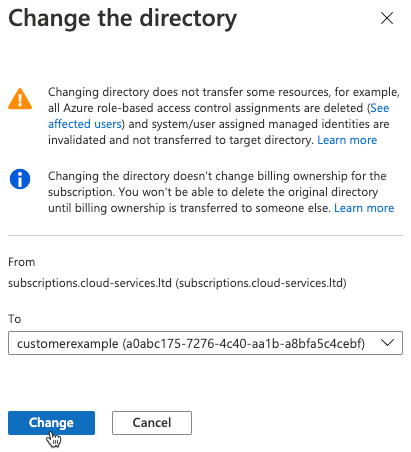
6. The Subscription’s page will be displayed. Click “Change directory”:

7. The “Change the directory” dialog will be displayed. Select the desired target Directory, and then click Change:
8. The UI will display a message indicating that the Subscription will be transferred to the selected AAD:
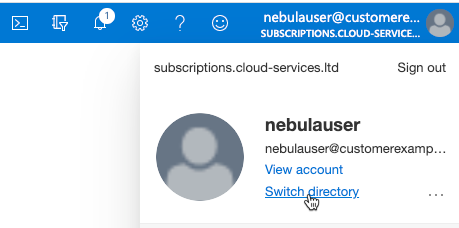
9. After about 10 minutes, click on the user icon in the upper right-hand side of the screen, and then click on “Switch directory”:
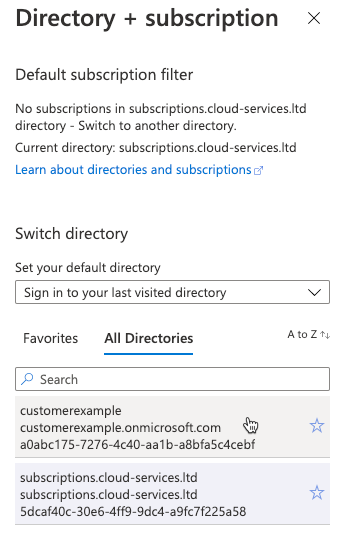
10. Select your corporate AAD, to which the Subscription is being transferred
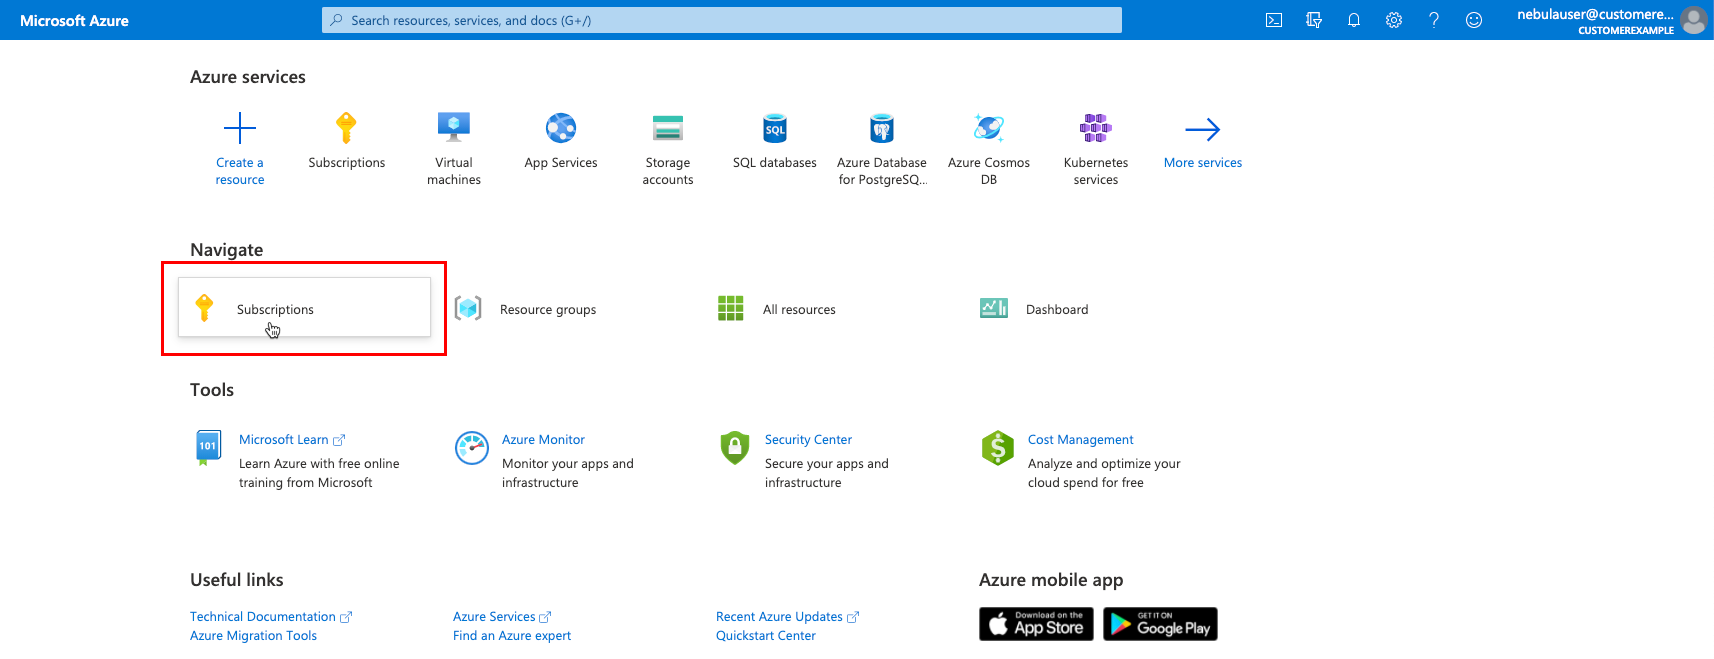
11. You will be directed to the Azure Home Page for the desired Directory. Click on the Subscriptions button:
12. You will be directed to the Azure Subscriptions page. The Subscription will now appear in your Corporate AAD:
13. You can now deploy and manage assets under the Subscription as normal.