This article describes how to add Support Information that is displayed to your Organizations using the Cloud Core Services application. This information is specific to your Provisioning Entity and is displayed only to your Organizations
Overview
Within the Cloud Core Services application, users have access to a “Support Information” page as described in How to View Support Information in Cloud Core Services
Each Provisioning Entity can define the specifics of what is shown to their subset of Organizations using Cloud Core Services. If it’s not defined, the Support Information function is not shown.
The Support Information function is capable of:
- Displaying up to 5 different “sections” of information. The Provisioning Entity can define the name of each section.
- Each section can have up to five different lines of information. Each line of information consists of a “Label” and a “Value”
- The “Label” is simply text describing the value
- The “Value” can be one of three things:
- Text: street addresses, phone numbers, or anything else you want to display
- Link: a hyperlink to an external website (ticket system, marketing info, etc)
- MailTo: a link to an email address that will open up the user’s email client with a mail addressed to the email address
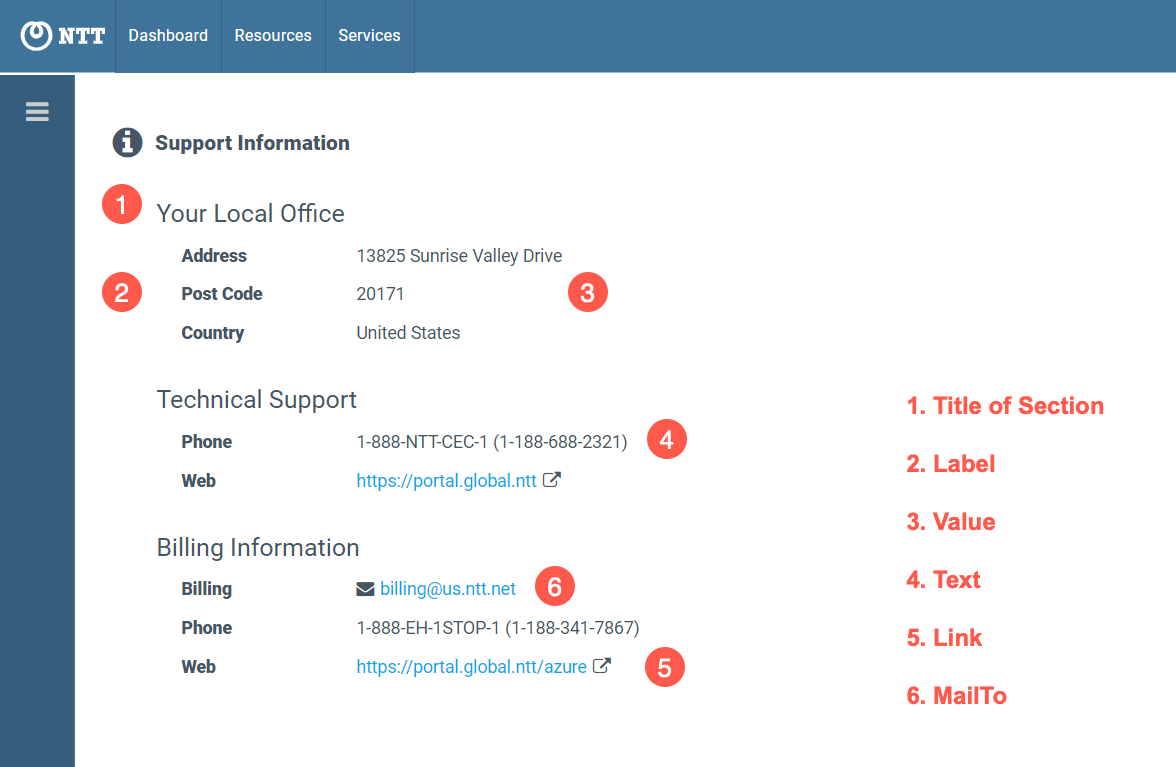
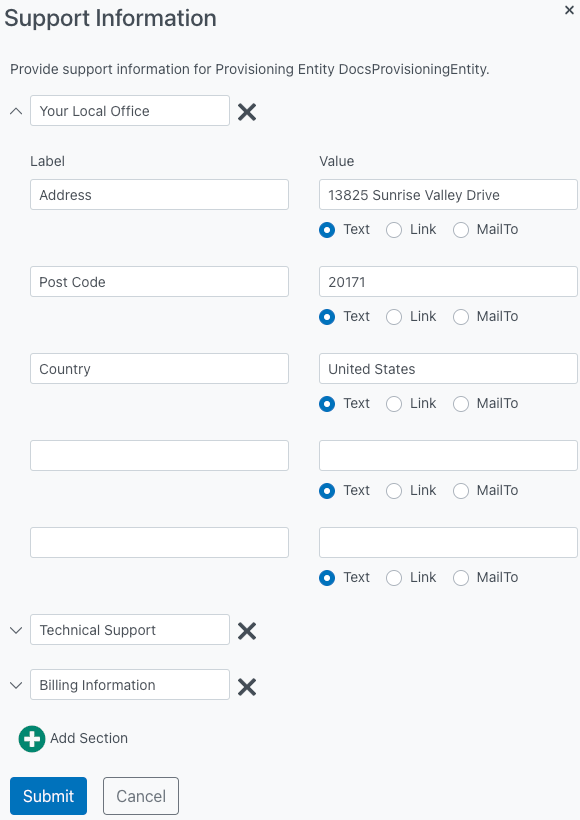
An example of what this looks like is below. This example has three Sections (“Your Local Office”, “Technical Support”, and “Billing Information”. The “Your Local Office” section has three rows with text values such as label: Address, value: 13825 Sunrise Valley Drive. The “Technical Support” section has two rows, one with a text value and the other with a link value. The “Billing Information” section has a mailto value, a text value, and a link value.
The following section will show how to define this information.
Add and View/Edit Support Information in Nebula
PREREQUISITE: This function requires the user to have the Organization role.
1. Log in to the UI. Click on the Support Information icon in the upper right-hand side of the screen:

2. The Support Information dialog will be displayed. Enter the appropriate information in the spaces provided:
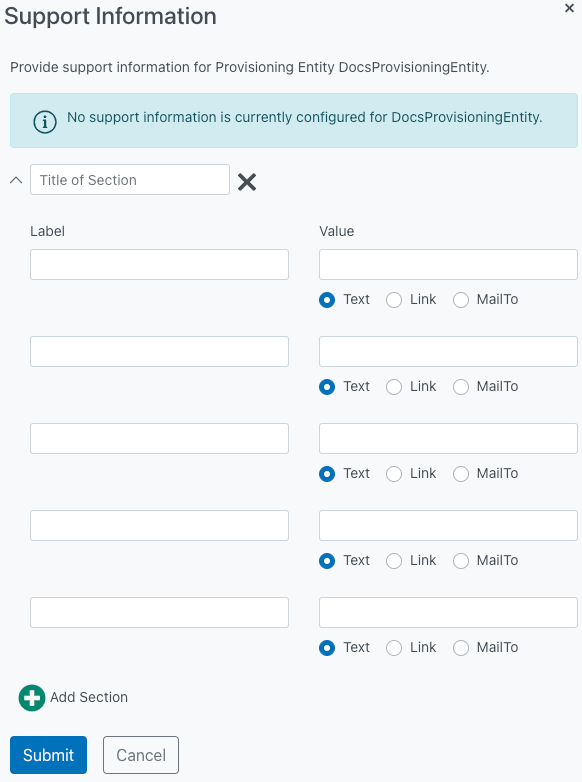
When the dialog opens, it will appear as above. Each of the sections consists of up to five name(label) – value pairs:
- Title of Section – This will appear as the heading for the section. Up to 64 characters
- Label – This can be text up to 64 characters
- Value – This can be text up to 64 characters
- Text – Will appear as plain text. Up to 64 characters
- Link – Will be a hyperlink. Up to 64 characters
- MailTo – Will be a MailTo link – it will open an email with the text of the MailTo box as the recipient. Up to 64 characters
- Note: Different web browsers will handle MailTo values differently
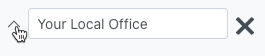
3. You can expand and/or collapse a section by clicking on the expand/collapse icon:
4. Click the Add Section button to expand the dialog and add another section:
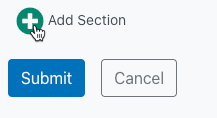
5. Once you have added the desired information, click the Submit button:

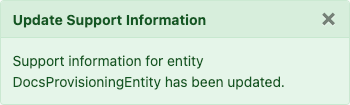
6. The UI will display a message indicating that the Support Information has been updated:
7. You can click on the Support Information icon in the upper right-hand side of the screen again to view and/or edit the information you have entered:
View Support Information in Cloud Core Services
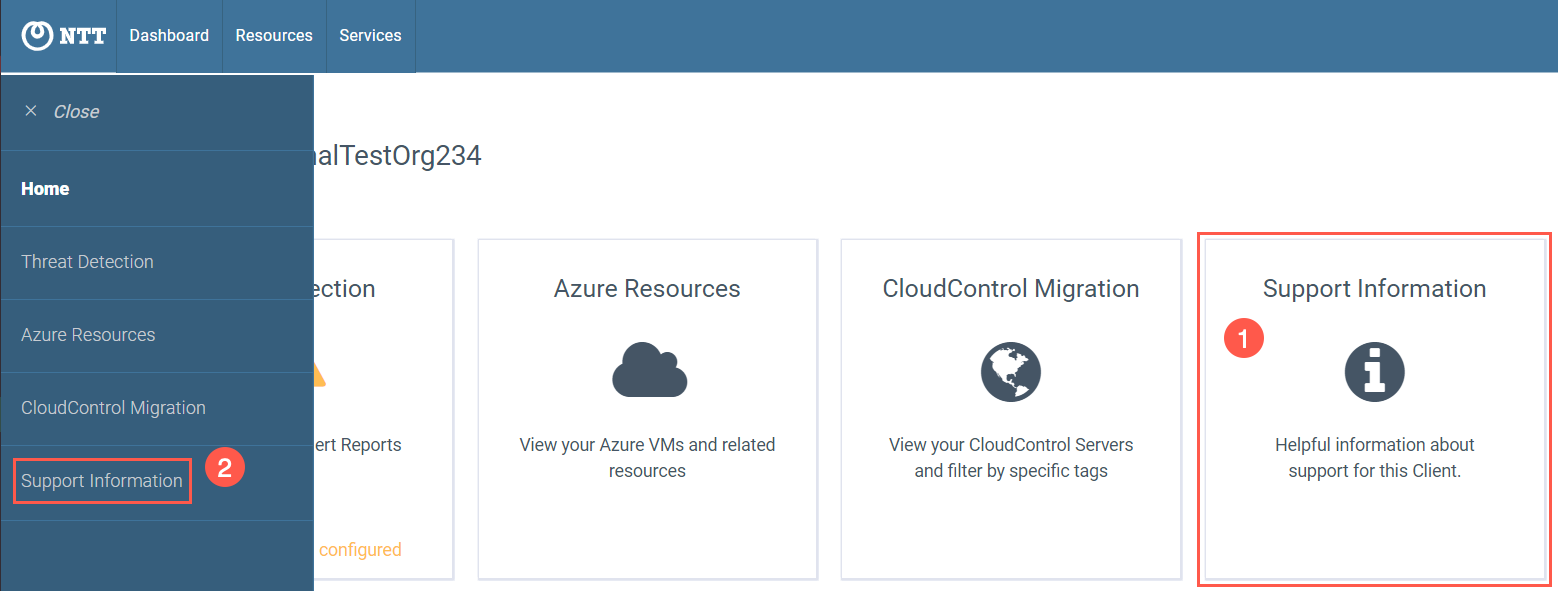
1. In the Cloud Core Services App, click on the Support Information tile (1), or the Support Information button (2) in the left-hand menu:
2. The Support Information entered in Nebula will be displayed: